Ultimate Guide to Canon G7X מצלמת: Tips, Settings, and Creative Techniques
The Canon PowerShot G7X series has revolutionized the way content creators, vloggers, and photography enthusiasts capture their world. This compact yet powerful camera, known in Hebrew as “מצלמת Canon G7X,” offers professional-quality imaging in a pocket-sized device. Whether you’re a seasoned photographer or just starting your creative journey, understanding how to maximize the potential of your Canon G7X can dramatically improve your visual storytelling.
In this comprehensive guide, we’ll explore everything from optimal settings and creative techniques to practical tips for everyday use. We’ll dive into the specifics of both the Mark II and Mark III models, covering photography and video capabilities that make this camera a favorite among content creators worldwide. From mastering manual controls to utilizing special features for vlogging, this article will help you transform your Canon G7X from a simple point-and-shoot into a powerful creative tool.
Let’s unlock the full potential of your Canon G7X מצלמת and elevate your photography and videography to new heights.
Understanding Your Canon G7X מצלמת: Features and Capabilities
The Canon G7X series stands out in the compact camera market for its impressive balance of portability and performance. Before diving into settings and techniques, it’s essential to understand what makes this camera special.
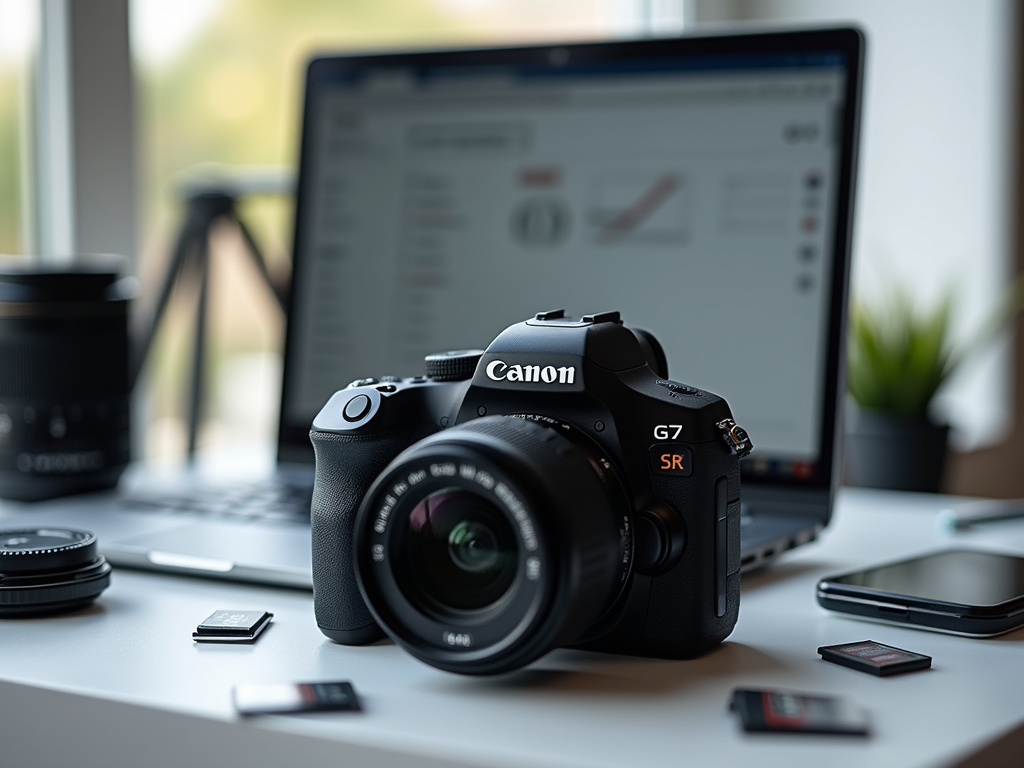
At the heart of the Canon G7X is a 1-inch CMOS sensor, significantly larger than those found in typical point-and-shoot cameras. This larger sensor allows for better light gathering capabilities, producing images with reduced noise and improved dynamic range.
The camera features a bright f/1.8-2.8 lens with a versatile 24-100mm equivalent zoom range. This combination makes it ideal for everything from wide landscape shots to flattering portraits with beautiful background blur.
For vloggers and video content creators, the G7X offers full HD 1080p recording (4K in the Mark III), with the later models adding features like a dedicated microphone input for improved audio quality. The flip-up touchscreen display makes framing self-portraits and vlog-style videos remarkably simple.
Other notable features include:
- Advanced image stabilization for steady shots even when moving
- Wi-Fi and Bluetooth connectivity for easy sharing and remote control
- RAW shooting capabilities for maximum editing flexibility
- Fast continuous shooting for capturing action
- Compact size that fits easily in a pocket or small bag
Understanding these core capabilities will help you make the most of your Canon G7X מצלמת as we explore specific settings and techniques in the following sections.
Optimal Photo Settings for Your Canon G7X
Getting the perfect shot with your Canon G7X מצלמת starts with the right settings. While auto mode works well for casual shooting, customizing your settings can dramatically improve your results.
Start by exploring the camera’s shooting modes. For beginners, the Program (P) mode offers a balance between automation and control. The camera handles exposure calculations while allowing you to adjust settings like ISO and white balance.
As you grow more comfortable, Aperture Priority (Av) mode gives you control over depth of field. Use wider apertures (lower f-numbers) for portraits with blurred backgrounds, and narrower apertures (higher f-numbers) for landscapes where you want everything in focus.
For the highest quality images, consider these foundational settings:
- Image Quality: RAW + JPEG for maximum flexibility in post-processing
- ISO: Keep as low as possible (ideally 100-400) to minimize noise
- White Balance: Auto works well in most situations, but customize for challenging lighting
- Picture Style: Standard for general photography, but Portrait for people and Landscape for nature
The Canon G7X offers excellent autofocus capabilities, but understanding focus modes enhances your control. Face+Tracking works well for portraits and vlogging, while 1-Point AF gives precise control for still subjects.
Take advantage of the camera’s built-in ND filter for shooting in bright conditions. This feature allows you to use wider apertures even in bright sunlight, maintaining that beautiful background blur.
For creative photography, experiment with the Creative Filters mode, which offers effects like Toy Camera, Fish-eye, and Miniature. These can add unique character to your images without post-processing.
Mastering Video Settings on the Canon G7X for Vlogging
The Canon G7X מצלמת has earned its reputation as a vlogger’s favorite for good reason. Its combination of image quality, flip screen, and portable size makes it ideal for creating video content on the go.
For optimal video quality, configure these essential settings:
- Resolution and Frame Rate: 1080p at 60fps provides smooth footage with room for slow-motion effects (or 4K at 30fps on the Mark III)
- Movie Format: MP4 offers the best balance of quality and compatibility
- Autofocus Method: Face+Tracking works best for vlogging
- Image Stabilization: Set to “Dynamic” for the smoothest footage while moving
One of the most useful features for vloggers is the Self Portrait mode. When you flip the screen up, the camera automatically enters this mode, optimizing settings for close-up recording of yourself.
Audio quality is crucial for engaging vlogs. While the built-in microphone works adequately in quiet environments, consider using the Wind Filter option when shooting outdoors. For the Mark III, the microphone input allows connecting external mics for professional audio quality.
The camera’s touchscreen makes focusing intuitive during recording. Simply tap on your subject to refocus, creating smooth focus transitions. This feature is particularly valuable when moving between subjects at different distances.
Battery life can be a limitation during extended vlogging sessions. Navigate to the power settings and enable Eco Mode to extend recording time. Always carry spare batteries for longer shooting days.
For cinematic-looking footage, experiment with the Manual Movie Exposure setting. This allows you to lock your shutter speed (ideally at 1/50 or 1/60 for natural motion blur) while the camera adjusts other parameters as lighting changes.
Advanced Creative Techniques with the PowerShot G7X
Beyond basic settings, the Canon G7X מצלמת offers numerous creative possibilities for photographers willing to experiment. These techniques can help you develop a unique visual style.
Try focus bracketing for macro photography. This technique involves taking multiple shots at slightly different focus points, which can later be combined in post-processing for images with extraordinary depth of field.
The G7X’s control ring around the lens provides quick access to your most-used settings. Customize this ring for parameters you adjust frequently, such as aperture or exposure compensation, streamlining your shooting workflow.
Create striking low-light images by utilizing the camera’s impressive high ISO performance. While keeping ISO as low as possible is generally good practice, the G7X performs remarkably well up to ISO 1600, making nighttime street photography and indoor shooting viable without a flash.
For unique perspectives, take advantage of the tilting screen for low-angle shots. This can transform ordinary subjects into visually interesting compositions by showing them from unexpected viewpoints.
Experiment with exposure bracketing for high dynamic range (HDR) photography. Set the camera to take three consecutive shots at different exposure levels, then combine them in editing software to capture both shadow and highlight detail.
The G7X’s excellent close-focusing capabilities make it ideal for macro photography. Get as close as 5cm to your subject in wide-angle mode to capture intricate details of flowers, insects, or textures.
Master the art of panning for dynamic action shots. Set a slower shutter speed (around 1/30), then follow a moving subject while taking the photo. When done correctly, your subject remains sharp while the background blurs with motion, creating a sense of speed and energy.
Optimal Custom Settings for Different Scenarios
Your Canon G7X מצלמת is a versatile tool that can adapt to various shooting scenarios. Creating custom settings for different situations allows you to switch quickly between optimal configurations.
For landscape photography, prioritize maximum detail and depth of field with these settings:
- Aperture: f/8 to f/11 for maximum sharpness
- ISO: 100 for minimal noise
- White Balance: Daylight or Cloudy depending on conditions
- Picture Style: Landscape for enhanced blues and greens
- Focus: One-shot AF with center point for precision
When shooting portraits, create pleasing background blur and flattering skin tones:
- Aperture: f/2.8 to f/4 for subject isolation
- Focal Length: Zoom in to 70-100mm equivalent for flattering perspective
- ISO: 100-400 depending on lighting
- Picture Style: Portrait for enhanced skin tones
- Focus: Face Detection AF
For action and sports, capture fast-moving subjects with these settings:
- Shutter Speed: At least 1/500 second to freeze motion
- Drive Mode: Continuous shooting
- Focus: Servo AF to track moving subjects
- ISO: Auto with a maximum of 3200 to maintain fast shutter speeds
Configure your camera for night photography with these settings:
- Mode: Manual or Shutter Priority
- ISO: 800-1600 (higher if necessary)
- Shutter Speed: 1/15 to several seconds depending on subject
- White Balance: Tungsten for urban scenes, Auto for mixed lighting
- Stabilization: On
- Consider using a mini tripod for longer exposures
Save these configurations to the camera’s custom settings bank for quick access. The G7X allows saving settings to the C1 and C2 positions on the mode dial, making it easy to switch between specialized configurations without navigating menus.
Advanced Vlogging Techniques with the Canon G7X מצלמת
The Canon G7X has become synonymous with vlogging for good reason. Beyond basic video settings, several advanced techniques can elevate your vlogging content to professional quality.
Create cinematic b-roll by combining slow camera movements with the camera’s excellent image stabilization. Experiment with panning, tilting, and revealing shots to add visual interest between talking segments.
The camera’s flip screen makes creative framing accessible. Try positioning yourself off-center using the rule of thirds for more dynamic composition. This simple change can make your vlogs look more professional and intentionally composed.
Master manual focus pulling for dramatic effect. Start with your face in focus, then switch focus to an object in the foreground or background to direct viewer attention. Practice this technique to create smooth, intentional focus transitions.
Leverage the G7X’s excellent low-light performance for mood lighting. Rather than always shooting in bright conditions, experiment with atmospheric lighting like golden hour, candlelight, or street lamps to create emotionally resonant content.
For travel vlogging, use the camera’s time-lapse function to create stunning transitions between locations. Set up the camera on a mini tripod and let it capture the changing scene over time, compressing hours into seconds of dynamic footage.
Take advantage of the Star Time-Lapse Movie mode (available on some models) for night sky videography. This specialized setting is designed to capture the movement of stars, creating breathtaking footage of the night sky.
When editing your footage, use the camera’s custom white balance feature to maintain consistent color throughout your vlog, even when moving between different lighting environments. This attention to detail significantly improves the professional look of your videos.
Maximizing Image Quality with Your PowerShot G7X
While the Canon G7X מצלמת delivers excellent results straight out of camera, understanding how to maximize image quality can take your photography to the next level.
Shoot in RAW format whenever possible. This uncompressed file format preserves all the data captured by the sensor, giving you maximum flexibility during editing. You can adjust exposure, white balance, and color with minimal quality loss.
When shooting in JPEG, customize the Picture Style settings to match your aesthetic preferences. Adjust parameters like sharpness, contrast, saturation, and color tone to create a consistent look across your images.
Take advantage of the camera’s Auto Lighting Optimizer for challenging lighting situations. This feature brightens shadows and recovers highlight details in high-contrast scenes, providing more balanced exposures.
For landscapes and architecture, enable lens correction settings. These compensate for common lens issues like distortion, chromatic aberration, and vignetting, resulting in cleaner, more professional-looking images.
Master exposure compensation for tricky lighting scenarios. The G7X’s metering system is generally reliable, but scenes with bright highlights or deep shadows may benefit from manual adjustment. Use the +/- button to override the camera’s suggested exposure.
In low light, use image stabilization to capture sharper images at slower shutter speeds. The G7X’s effective stabilization system allows shooting handheld down to 1/15 second or slower, depending on your steadiness and focal length.
For critical sharpness, utilize the 2-second self-timer or a remote trigger when shooting on a tripod. This eliminates the slight camera shake that occurs when pressing the shutter button, ensuring maximum sharpness.
Accessories and Add-ons to Enhance Your Canon G7X
The right accessories can significantly expand the capabilities of your Canon G7X מצלמת. These add-ons help overcome limitations and add new creative possibilities to your photography and videography.
A mini tripod is perhaps the most essential accessory for G7X owners. Models like the Joby GorillaPod provide stability for long exposures, time-lapses, and self-portraits. Their flexible legs can wrap around objects, creating mounting options almost anywhere.
Extend your battery life with spare batteries. The G7X is known for relatively short battery life, especially when recording video. Carrying 2-3 extra batteries ensures you never miss a shot during long shooting sessions.
For the Mark III model with microphone input, an external microphone dramatically improves audio quality. Options like the Rode VideoMic Go or the more compact Rode VideoMicro provide clearer, more directional sound than the built-in microphone.
A neutral density (ND) filter attached to the lens allows for wider apertures in bright conditions. This is particularly useful for maintaining shallow depth of field for portraits and cinematic video in daylight.
Protect your investment with a camera case that fits the compact dimensions of the G7X. Look for options with padding that don’t add excessive bulk, maintaining the camera’s pocket-friendly nature.
For underwater photography and water activities, consider a waterproof housing. Official Canon housings allow operation of all controls while protecting your camera down to significant depths.
Enhance your grip and shooting comfort with an add-on grip. These attachments improve handling during extended use and often include an Arca-Swiss compatible base for quick tripod mounting.
For content creators, a small LED light that fits in the hot shoe provides fill lighting for vlogs and portraits in challenging lighting conditions. Options like the Lume Cube or Manfrotto Lumimuse series offer adjustable brightness in compact packages.
Post-Processing Workflow for Canon G7X Images
The journey to creating stunning images with your Canon G7X מצלמת doesn’t end when you press the shutter. A thoughtful post-processing workflow can enhance your photos while maintaining their natural qualities.
Start by organizing your images in a digital asset management system like Adobe Lightroom or Capture One. Create a consistent folder structure and develop a rating system to quickly identify your best shots from each session.
When editing RAW files, begin with basic adjustments:
- White balance correction to establish accurate colors
- Exposure adjustments to optimize brightness
- Contrast enhancement to add depth
- Highlight and shadow recovery to balance dynamic range
The G7X’s files respond particularly well to targeted adjustments. Use radial or graduated filters to enhance specific areas of your image without affecting others. This allows for creative dodging and burning techniques that draw attention to your subject.
For portrait editing, take advantage of skin smoothing tools, but use them subtly. The G7X captures excellent detail, and over-processing can result in unnatural-looking skin. Focus on removing temporary blemishes while preserving skin texture.
Develop a consistent editing style that becomes your visual signature. This might involve a particular color grading approach or contrast level that ties your body of work together. Consider creating preset settings that you can apply as starting points for future edits.
For vlog footage, basic color correction in video editing software can significantly improve visual quality. Adjust temperature and tint to neutralize color casts, then enhance saturation and contrast to create a pleasing look that remains consistent across different shooting environments.
Finally, when exporting your images for different purposes, understand the optimal settings for each destination. Social media platforms, prints, and websites all have different resolution and compression requirements for best results.
Troubleshooting Common Issues with the Canon G7X
Even the best cameras occasionally present challenges. Understanding common issues with the Canon G7X מצלמת and how to resolve them ensures you can keep shooting without frustration.
If you encounter focusing problems, particularly in low light, try these solutions:
- Switch to center-point AF for more precise focus
- Use the AF assist beam in very low light
- Increase contrast in your scene by adding light or changing position
- For macro subjects, maintain the minimum focusing distance (5cm at wide angle)
To address short battery life, implement these strategies:
- Enable Eco Mode in the settings menu
- Reduce screen brightness
- Disable Wi-Fi and Bluetooth when not in use
- Turn off the camera between shots rather than relying on auto power-off
- Carry multiple spare batteries for extended shooting sessions
If you notice overheating during video recording, particularly with the Mark III during 4K capture:
- Avoid recording in direct sunlight
- Use shorter recording segments with cooling breaks
- Consider dropping to 1080p resolution for longer continuous recording
- Update firmware to the latest version, as Canon has released updates addressing this issue
For Wi-Fi connectivity issues with your smartphone:
- Ensure both devices have the latest software/firmware
- Try resetting the camera’s network settings
- Move away from sources of wireless interference
- For persistent problems, consider using a memory card reader as an alternative transfer method
If you encounter a lens error message, which occasionally happens with compact cameras:
- Never force the lens mechanism
- Try a fresh battery, as low power can cause false errors
- Gently clean the lens barrel with a soft, dry cloth
- If persistent, contact Canon support as this may require professional service
Conclusion: Mastering Your Canon G7X מצלמת
The Canon G7X series represents an impressive balance of portability, image quality, and creative control. Throughout this guide, we’ve explored the many facets of this powerful compact camera, from basic settings to advanced techniques for both photography and videography.
By understanding and implementing the tips, settings, and workflows discussed, you can transform your Canon G7X מצלמת from a simple point-and-shoot into a professional creative tool. Whether you’re vlogging, capturing travel memories, or pursuing artistic photography, this camera offers capabilities that rival much larger systems.
Remember that mastery comes with practice. Experiment with different settings, techniques, and subjects to discover your unique visual style. The best camera is the one you have with you, and the G7X’s pocket-sized form factor ensures you’ll never miss a photographic opportunity.
Frequently Asked Questions About Canon G7X מצלמת
What makes the Canon G7X ideal for vlogging?
The Canon G7X is perfect for vlogging due to its combination of a flip-up screen for self-framing, excellent autofocus with face tracking, superior image quality from the 1-inch sensor, and compact size. The built-in image stabilization creates smoother footage when moving, while the wide-angle lens can capture both you and your surroundings. The Mark III model adds 4K video and a microphone input for even better vlogging capabilities.
What’s the difference between the G7X Mark II and Mark III?
The main differences include: the Mark III offers 4K video recording (vs 1080p on Mark II), has a microphone input for better audio, uses a newer DIGIC 8 processor (vs DIGIC 7), offers vertical video recording for social media, has improved autofocus performance, and supports live streaming to YouTube. Both cameras share the same 20.1MP 1-inch sensor and similar lens specifications.
How can I maximize battery life on my Canon G7X?
To extend battery life, enable Eco Mode in the settings menu, reduce screen brightness, disable Wi-Fi and Bluetooth when not in use, turn off the camera between shots, use the viewfinder instead of the LCD screen when possible, and carry multiple spare batteries for extended shooting sessions. In cold weather, keep spare batteries warm in an inside pocket until needed.
What are the best settings for low-light photography with the G7X?
For low-light photography, use the widest aperture (f/1.8-2.8), set ISO between 800-1600 (higher if necessary but watch for noise), enable image stabilization, use a slower shutter speed (1/30 or slower with stabilization), activate the AF assist beam for better focusing, shoot in RAW format for maximum editing flexibility, and consider using a mini tripod for longer exposures without camera shake.
Can the Canon G7X shoot in RAW format, and why should I use it?
Yes, the Canon G7X can shoot in RAW format. RAW files preserve all the data captured by the sensor without compression or processing. This provides significant advantages: greater flexibility in post-processing, better recovery of highlights and shadows, precise white balance adjustment after shooting, superior noise reduction capabilities, and non-destructive editing. RAW is especially valuable in challenging lighting conditions where JPEG might lose detail in highlights or shadows.
How does the G7X compare to smartphone cameras?
The G7X offers several advantages over smartphone cameras: a much larger 1-inch sensor for better image quality and low-light performance, a bright f/1.8-2.8 zoom lens with true optical zoom (versus digital zoom on phones), dedicated physical controls for faster operation, superior depth of field control, RAW shooting capabilities, better battery life for photography, and more powerful flash. While smartphones offer convenience and computational photography features, the G7X provides significantly better image quality and creative control.
What accessories are essential for G7X vloggers?
Essential accessories for G7X vloggers include: a mini tripod with flexible legs (like the Joby GorillaPod), multiple spare batteries for extended shooting, a fast and high-capacity memory card, an external microphone for the Mark III, a small LED light for low-light situations, a protective case for transport, ND filters for shooting in bright conditions with wide apertures, and potentially a waterproof housing for underwater or extreme weather shooting.
How can I transfer photos from my G7X to my smartphone?
To transfer photos wirelessly, install the Canon Camera Connect app on your smartphone, enable Wi-Fi on your G7X (press the Wi-Fi button or access through menu), select smartphone connection on the camera, follow the on-screen instructions to establish connection, then use the app to browse and download images. For faster transfers of many images, you can also use a card reader connected to your phone or computer.
References: